How I am self-sufficient in soya milk (soy milk)
- Angela Hart

- Sep 7, 2025
- 3 min read
I thought I would share with you my process for making soya milk (soy in the US) from scratch—a surprisingly rewarding skill to master. While it's technically not classified as "milk," the nutritional value and versatility make it a fantastic alternative, and frankly, I'm not fussed about semantics.
For those interested in self-sufficiency or prepping, this is an excellent technique to refine. With just dried soybeans (which can be stored long-term or cultivated yourself) and access to clean water, you can produce a nourishing beverage rich in protein and essential minerals—enough to sustain you and your family.
And if you stock a coagulant, you can take it a step further by making tofu, transforming this simple process into a reliable foundation for hearty, protein-packed meals.
For the video click here
Ingredients
Soya (soy) beans
Clean water
Equipment
A large bowl
A large saucepan
A large jug
A vessel (in which to soak the beans)
A vessel (in which to store the finished product)
A sieve
A cheesecloth
A method of blending
A funnel is handy for when transferring the beans if using jars!
A tea strainer is handy when removing the skins!
Method
Take 1 cup of dried organic soya beans (or use fresh if available)
Rinse with clean water
Transfer to your storage vessel
Add water to the vessel
Soak for up to 2 days in the fridge
Important tip!
Be sure to rinse the beans and change the water regularly otherwise they will taste off. Every 10 - 12 hours I do this.
Drain and rinse the beans
Transfer to a saucepan
Pick out any bad discoloured beans, noting sometimes it's just the outer skin that is discoloured, discard that and if the bean is a cream colour don't throw it away
Add water to the saucepan, around 50mm above the beans
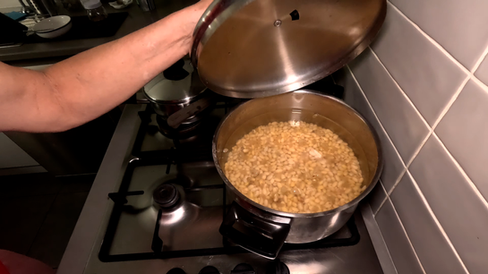
Bring the beans to the boil and simmer for around 30 - 45 minutes
Drain and rinse
Transfer to a large bowl
Aggressively agitate the beans, to loosen the outer skins
Remove the outer skins from the water
Rinse the beans
Return the beans to the sauce pan or blender
Add fresh filtered water, purified water or your usual drinking water to the saucepan Important tip!
Only add water to the level of the beans, not above them
Blend until a pulp, but not to the nth degree!
Lay your cheesecloth over a jug
Ladell the pulp into the cheesecloth, a small amount at a time
Squeeze the milk through the cheesecloth
Repeat until all the pulp is processed
Allow to cool and keep in the fridge
Voila, I have some great soya milk to use in tea, coffee and cereal!
I start with 1 cup of dried organic soybeans—though if I have fresh ones available, I’ll use those instead.
I rinse the beans thoroughly with clean water, then transfer them to my storage vessel and fill it with water. I let them soak in the fridge for up to two days.
Important step: I make sure to rinse the beans and change the water regularly—every 10 to 12 hours—so they don’t develop an off taste.
Once soaked, I drain and rinse the beans again, then transfer them to a saucepan.
I sort through them, picking out any discoloured ones. If it’s just the outer skin that looks off and the bean underneath is still a creamy colour, I keep it.
I add water to the saucepan—about 50mm above the beans—bring it to a boil, and then let it simmer for 30 to 45 minutes.
After cooking, I drain and rinse the beans again and transfer them to a large bowl. I agitate them vigorously to loosen the outer skins, remove the skins from the water, and rinse the beans once more.
Then I return the beans to the saucepan or move them to a blender. I add fresh filtered, purified, or drinking water—just enough to reach the level of the beans, not above.
Important tip: I never add more water than to the level of the top of the beans
I blend the mixture into a pulp, but I don’t overdo it. Then I lay a cheesecloth over a jug and ladle the pulp into it, a small amount at a time.
I squeeze the milk through the cheesecloth and repeat the process until all the pulp has been processed.
Once it’s done, I let the soy milk cool and store it in the fridge.
This keeps well in the fridge, is additive-free and the feeling of achievement alone makes it worth the effort!


Comments